
a plugin for Cinema 4D XL
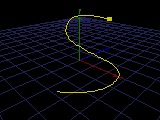
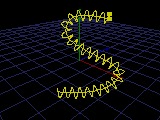
Helix creates a coiled spline around a user-drawn spline. It is perfect for creating a coiled phone cord, a spring, or similar objects. The resulting object can either be static or animated.
|
|
|
|
|
|
|

|
- Now compatible with the XL and SE 5.2 upgrade
- Offset the helix at start and end for e.g. phonecords
- Scale the radius along the spline (Endscaling)
- The name of the result is changeable
- Undo-capatibilities added
The first step is to create a spline. It can be in whatever shape you wish - curved or straight! Highlight the spline in the object manager. Now select "Helix 1.2" from your object plugin menu. You will be presented with this dialog (new items in 1.2 are marked with an * below):
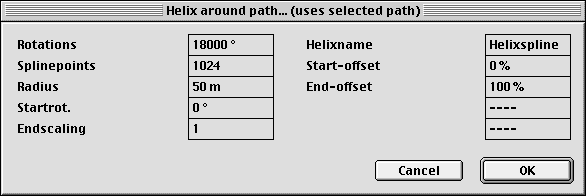
Rotations:
The total number
of helix rotations (in degrees).
Splinepoints:
The total number of spline points the helix will have
(applied on a linear basis).
Radius:
The radius of the helix (in world units).
Startrot.:
Adjusts the start rotations of the helix (in degrees).
Endscaling*:
Makes the helix bigger or smaller towards the end.(similar
to the endscaling of pipe-objects).
Helixname*:
The name of the resulting helix. If there already
is an object named like this you are presented with a dialog. Pressing
"yes" uses/replaces the object, "no" appends a number
to your name and "cancel" aborts the operation.
Start-offset*:
Enter the position along the spline that you want
the helix to start at. Before this point the generated spline follows
the input-spline.
End-offset*:
Enter the position along the spline that you want
the helix to end at. After this point the generated spline follows the
input-spline. The two offsets are good for e.g. creating a "spiral
cord" with a little straight cord at the two ends.
Fill in the dialog values and click "ok". It may take a few moments, depending on the complexity of the helix and the speed of your CPU.
Animated Helix works in a similar fashion to the static version, with the added capability of keyframable parameters. Create a spline as above to generate the helix along. With this spline highlighted, activate the sequence manager. Choose "Helix 1.2" from Function->New Track menu. This will add a "Helix 1.2" track to the spline object. Next, create a sequence for the track.

Add a keyframe, and the following dialog will appear: (new items in 1.2 are marked with an * below):

Rotations: (animated)
The total number of helix rotations (in degrees).
Splinepoints:
The total number of spline points the helix will have
(applied on a linear basis).
Radius: (animated)
The radius of the helix (in world units).
Startrot.: (animated)
Adjusts the start rotations of the helix (in degrees).
Helixname:
Input a name for this helix. Please note that when
using the animated plug-in, in case there exists an object with this name
it will be deleted.
Endscaling*: (animated)
Makes the helix bigger or smaller towards the end.(similar
to the endscaling of pipe-objects).
Start-offset*:
(animated)
Enter the position along the spline that you want
the helix to start at. Before this point the generated spline follows
the input-spline.
End-offset*: (animated)
Enter the position along the spline that you want
the helix to end at. After this point the generated spline follows the
input-spline. The two offsets are good for e.g. creating a "spiral
cord" with a little straight cord at the two ends.
Fill in the dialog values and click "ok". A new object will appear in the object manager, as well as the sequencer.
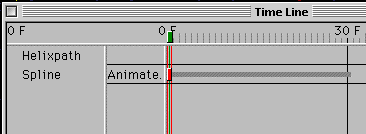
You can add more keyframes in the sequence if you like.
Be sure to check out the enclosed example scenes; they will also give you an idea on the capabilities of Helix 1.2. I hope you will find it to be a useful plug-in. If you have any suggestions (or problems) with it, please don't hesitate to contact me!
XLent Plugs are distributed by
|
Helix 1.2 ©1998, Mikael Sterner